Featured

A Mess up and a Blooper In My Bread Machine!

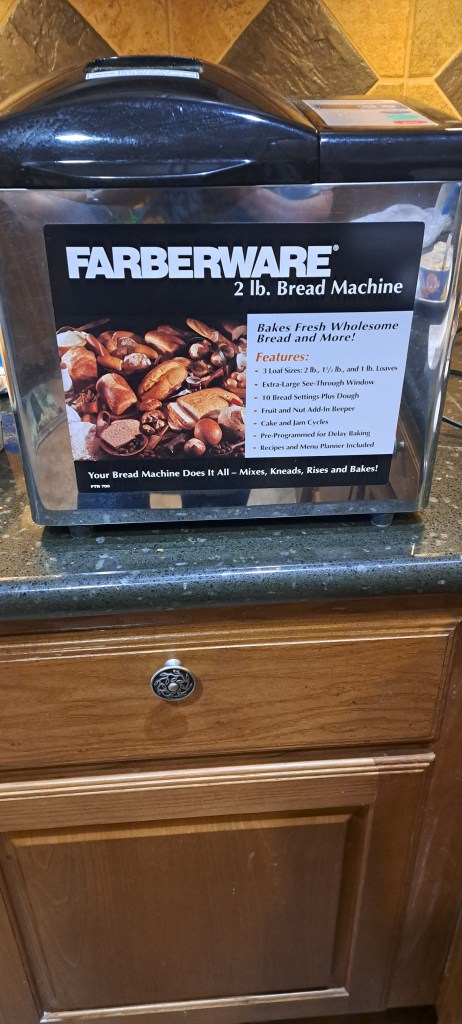
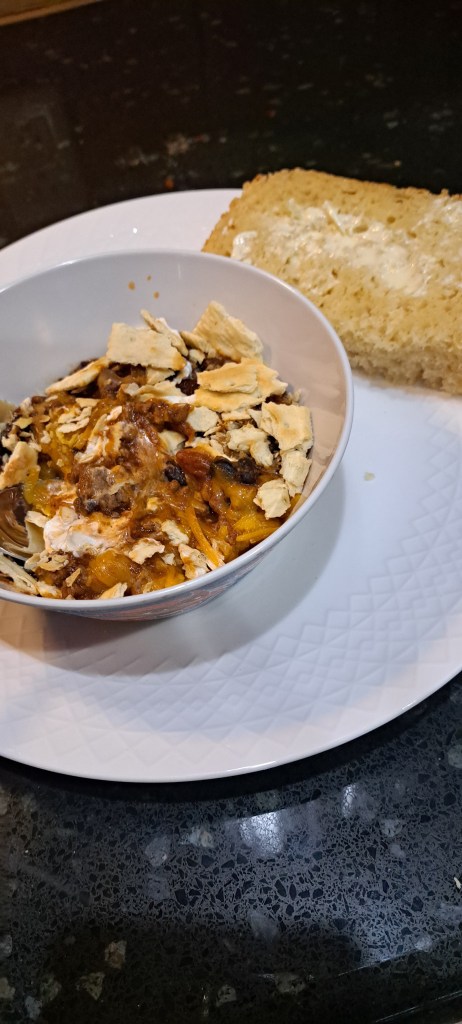
It’s been a very cold few days, here in Fort Worth. I decided to get out my bread machine and make some bread to go along with our chili. It’s been quite awhile since I’ve used my bread machine, mainly because it’s hard to find any of the box mixes at the grocery store. But I found a recipe, for making it from ingredients on hand.

I put all of the ingredients in the machine, and found my yeast. However, it expired in 2022. I took a chance and put it in. Then I turned it on. I watched it for about an hour, and it did NOTHING! Next, I found I had two current pkgs of yeast. So I scooped out the old yeast, and put the new in. It still did nothing. Was I frustrated? YOU’RE DARN TOOTIN’!!

Finally, I threw it all out and started over. It did call for so many teaspoons of yeast, but my pkg was just a smidgeon over that. I added it all. When I put the inner container back in the machine, I turned it a different way, and it clicked into place. Ahhhh…maybe that had been my problem! It started up and did its thing. Woohoo!!! The house smelled so good! I took my chili out of the freezer, and shortly before the bread was done, I heated the chili up. You know how much I love my freezer meals!!

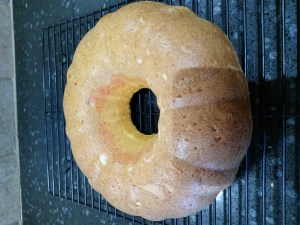
When I took the bread out of the machine, the top of it was caved in. I think it rose too much , hit the top of the machine, and fell back down. The rest of it was fine. Weird.

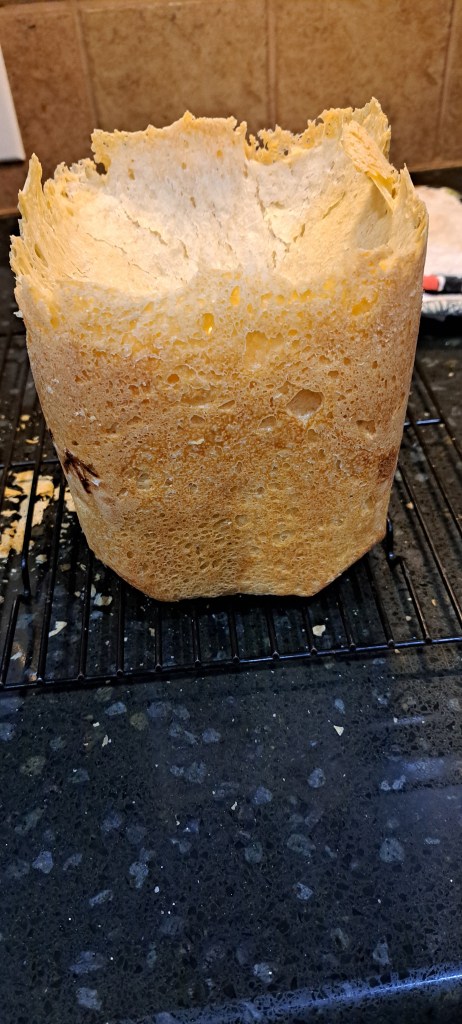
After I cut the top off, I got to the good stuff. My hubby and I both agreed that it was very tasty. Accompanying the chili, it hit the spot!

I’ve decided to master the homemade mixtures and use it more often. AND…I went to Amazon, and they had a lot of mixes for bread machines. I ordered a mix for Sour Dough bread. We’ll be trying that soon.

Are you a fan of bread machines? Do you use a recipe or do you buy a box mix?

Have a great day. Spring is coming soon. Let me know if you liked this post.

Hugs, Grandma Ruddell

Featured

GRANDMA CAMP

Oh my goodness! My hubby and I kept our three grandkids for a week of Grandma Camp. It really should have been Grandma and Boppa Camp….I couldn’t have done it without him. We had a lot of fun, and did a lot of activities. Last year, my youngest grandson, Isaac, who goes to a different camp every week of the summer, told his mom that I wasn’t very organized. I didn’t have a certain time for each activity. By golly, this year I was organized! Isaac will be seven in August, and lives locally. Libby will be eight in September, and she and her brother, Liam…who had just turned 11….live in Waco.

Boppa fixed breakfast for them. They ate a ton of pancakes and had a morning or so with donuts. I kind of like to sleep in. I let them play on their electronics until about 9:00 am. Libby and Isaac like art, creative games and come up with all kinds of things. Liam is a computer genius and prefers to be on the computer 24/7. My goal was to come up with activities to get them away from electronics. Our first activity, on Monday, was to make a Time Capsule. They each drew a picture and wrote about their activities that they enjoyed. We included a section of the newspaper, and a list of statistics. Liam decorated the box. We then found a hiding place for it, to be opened next year at the same time.

We also went to Isaac’s HOA park, and tie-dyed shirts. That was fun. When we got back, Libby and Isaac made a restaurant and we all had to come get a meal….even the house cleaner!

On Tuesday, it was the 4th of July. We went to the Movies. Then we came home and made a three layer cake….red, white and blue…with Isaac and Libby helping make it. Later, Liam frosted it. I may have baked it too long. It was kind of weird looking, and dry, but we added lots of whipped cream. Funnily enough, this was one of the kids’ favorite activities. Isaac’s parents came over for dinner, and they brought snakes and sparklers. (I’m sorry….this photo went wonky on me.)

On Wednesday, we had Game Day. We played darts, Uno, Crazy eights, Sorry and Jenga. We then went to McDonald’s and the robot served us lunch. Liam and I came home, and Boppa took the two younger ones swimming. Isaac got to stay for a sleepover. Yeah!

Thursday, Isaac and Libby did paint by number paintings. While I gave piano lessons in the afternoon, Libby and Isaac went with Boppa to the Trampoline Park. Liam worked on a game, her was making on the computer.

Friday, we went to the Modern Art Museum of Ft. Worth. What a great place! I bought two postcards for each of them, and we had to find that art piece and have a photo taken. They drew a picture of their favorite art, when they came home. Then we went to Andy’s Frozen Custard for a special treat.

Have you had Grandma Camp at your house? What all did you do? Were you exhausted when it was done? We were! Ha. But, ah, love those grandkids.

Hugs,

Grandma Ruddell

Featured

Jim Brown’s Peach Cobbler

Jim Brown’s Peach Cobbler is the best! Check out the recipe.

I am going to share with you one of my easiest, favorite desserts to make. Recently, I took this to an event, and everyone raved over it. One of the men from our church, Jim Brown, used to make this. Hence…the name, “Jim Brown’s Peach Cobbler”. Probably not officially a cobbler, but not a pie, and not a cake. Just yummy!

Here are the ingredients for the recipe.

  • 2 cans of peach pie filling
  • 1/4 c. of Amaretto or enough Almond extract to spread over filling
  • 17 oz Betty Crocker sugar cookie mix
  • 1 c. sliced almonds
  • 1 stick butter.

Preheat oven to 350*. Spray a 9 x 13 pan with non-stick spray.

Spread peach filling in bottom of pan. Pour amaretto or almond extract over filling. Spread sugar cookie mix over top. Sprinkle almonds over mixture. Top with 1 stick of butter that has been sliced and dot over cookie mix. Bake at 350 for 30-35 minutes. It is best to take it out of the oven while the dough is still soft and doughy. Top with whipped cream, ice cream, or eat plain.

Featured

Making a Charcuterie Board, #1

Need help making a charcuterie board? Check out this blog to begin your journey.

I love to make charcuterie boards! Today, I have made a simple appetizer charcuterie board for our dinner . Our daughter, husband and son are coming for dinner. We’re having sausage/cream cheese/Rotel crescent sandwiches and white chicken chili. There is usually a request for appetizers. What better way to have those, than have a charcuterie board!

If you’ve never made one, and don’t know where to start, just follow my process. I like to have several sizes of boards and little condiment dishes. I also ordered some white paper containers that resemble french fry containers. Too, I ordered a couple of kinds of picks. A place like Goodwill is a great place to find baskets, boards and containers.

my supplies

For this board, I’m using one of my cutting boards. I covered it with parchment paper, taping it on the back. I also used a small cutting board. I arranged a couple of small ramekins at each end, for green and black olives. Another small container holds Roasted Pine Nut Hummus. Then I positioned the paper holder at the other end, to try it all out.

A temporary layout

At this point, you can have fun playing with different ingredients. Because the hummus is at one end, I arranged carrots and wheat thins close by. Next came cheese, pepperoni and pretzels. I put a pepperoni rose in the center, and a fresh carnation flower at the end.

On the small board, I arranged pick fruit kabobs, made with strawberries and blueberries. They are easy to make, look cute and are easy to pick up and eat.

I ended up not using the paper holder. I almost put the kabobs in one, but decided to put them on the other board. If I had used my larger charcuterie board, I would have used the paper holder .

There are so many options for a charcuterie board. Grapes are always good, plus cheese cubes. Try fruits, nuts , chocolates, little cookies, crackers, etc. I’ll be making different kinds of boards in future posts. I think one of the keys to making charcuterie boards is to buy ahead and keep items like olives, crackers, little cookies, etc. on hand. They can be rather expensive, if you are making a large board, and need to buy things all at once.

Have fun and let your creative juices flow! Now….I just have to keep my hubby out of the food until my company arrives.

Let me know if you liked this recipe. Hit the like button on this page. What kind of charcuterie boards do you like to make?

Hugs,

Grandma Ruddell

Featured

A BUNDT CAKE FOR FALL

I am always looking for new recipes to add to my collection, and tantalize the taste buds of my friends and family. I recently saw one of my favorite vloggers, Dawn Madsen from the Minimal Mom, make this cake, and knew I needed to try it. It fit the bill, and I took it to a dinner at my kids’ house. We all agreed it was tasty and fun. Part of the appeal was the surprise inside. Here’s the recipe.:

CANDY CORN BUNDT CAKE

–1 white cake mix, 9 X 13

–4 egg whites

–1/2 c. oil

–1/2 c. warm water

–1 1/2 c. sour cream

–1 pkg. cheesecake pudding mix

Preheat oven to 325 F.Blend everything together in a medium bowl. Divide batter into three bowls. Add food coloring to make one bowl orange, one bowl yellow, and leave the other bowl white. Put batter into greased bundt pan in layers of white, orange and yellow. Bake at 325 for 47 – 53 minutes. Let cool for 15 minutes, and then remove from pan. Cool until room temperature.

FROSTING

–1 can of Cream Cheese Frosting

–Candy Corn

When the cake has cooled, put the can of cream cheese frosting in a gallon zip lock bag, with a small hole in the corner. Pipe the frosting onto the cake, as shown in the photo. Or if you prefer, just frost the cake with the frosting.

Place candy corn pieces around the top of the cake. Cut, serve. Delicious with ice cream!

I hope you enjoy this recipe. It’s a fun addition to your Fall meals!

Hugs,

Grandma Ruddell

Featured

About Grandma Ruddell

Minion Grandma

Grandma Ruddell….aka Sherry Ruddell, lives in Ft. Worth, TX.  She loves to play with her Grandkids and do craft projects with them.  Grandma loves to cook and create new recipes, do gardening, travel, organize and redo her house, and TRY to exercise.  She’s hoping that she will exercise more, since she is walking her new dog, Bill.  Grandma tries to find moments of joy in her everyday life.

Cookies…A Win and a Fail

Last night, my husband was going to go to a United Methodist Men’s cookout, at one of the members’ home. According to my hubby, there was going to be a cookout, and they were probably going to play dominoes. They could bring either an appetizer or dessert. One guy said he’d bring a bag of chips. I decided to make cookies to send with my hubby.

I made my chocolate no-bake cookies, and they turned out really yummy. Sometimes they work for me, and sometimes they don’t.

Then I decided to try a different recipe. I have my favorite recipe for peanut butter blossoms. I decided to make it into a bar cookie, and put either chocolate chips or hershey kisses on them, to look like dominoes. Clever idea, huh?

Unfortunately, those were kind of dry. I didn’t taste them at the time, because I was hurrying to get ready to go to Mexican Bingo. I was assembling a charcuterie board , to take to that group. Anyway, I found a nice tray, and put a selection of the no-bake cookies on it, and some of the “dominoes”.

My husband said the no-bake cookies were a big hit. The “dominoes” were kind of dry and he had to explain them to the men. The host had no plans to play dominoes! Where did my hubby get that idea???

You win some, you lose some. I tend to try new recipes on friends. This one didn’t work. Tell me….how could I have changed the cookie recipe into a bar cookie recipe? Should I have added another egg? Give me your suggestions. Of course, one of your suggestions might be to only send tried and true recipes off to a party.

What has been some of your wins and losses? I have mainly wins, but this time I threw away all of the rest of the cookie bars. My recipes are kind of like a game of dominoes…you win some, you lose some.

Hugs,

Grandma Ruddell

Mexican Bingo Charcuterie Board #2

Charcuterie Boards are the best! Check out my blog, to see my board to take to Mexican Bingo!

This afternoon, I made a Charcuterie Board. It was for a family dinner, and was a trial run for when I go to tomorrow night’s Mexican Bingo. My family was my guinea pig. Here’s what I did and I’m putting it here so you can do it too!

I have several sizes of boards. This time , I used the larger one. One of my recent purchases was the bag of little toothpick flags. So I used two of those and wrote Mexican Bingo on them. I pulled out several sizes of small ramekins and containers, and my kabob sticks. I didn’t use all of them, but it’s good to have them out to set up my station.

I decided to have a concentration of reds and greens, to represent Mexico. At one end of the board, I put a bunch of grapes. Next to it, I placed cut up sweet peppers. I spread a bunch of chips, added cheese cubes. At the other end, I added sliced strawberries, kiwi, and some fruit flavored jelly candy. The flags went on the cheese cubes.

Next, I added a container of Salsa and slices of Summer Sausage. I filled the rest in with green olives, pepperoni and some scattered Nutella biscuits…which are adorable little cookies with Nutella inside. Lastly, I put a daisy in the middle. And then…..my piano student arrived, and I made her come in , look at it, and ooh and ahh. LOL

My family enjoyed it, which was a good thing. My main dish was a little late getting done, so they snarfed from the board. Tomorrow night, I will make a few changes. I will add some wheat thins or crackers to go with the cheese. Also, I have a layered Mexican dip that I will add, and will make some taquitos to put in the french fry holder. And I will top it off with a Sunflower.

What kind of charcuterie boards have you made lately? Is that one of your staple recipes? I enjoy making them. Come back next week, when I present Charcuterie Board #3. Yes, I have more company coming! Woohoo!

If you enjoyed this post, please press LIKE, and leave a comment.

Hugs,

Grandma Sherry